The Lectric XP 2.0 has many different customizable settings so that you can make the bike ride just the way you like it. But, these settings can be a bit confusing and hard to figure out. In this article, I will explain what each setting does and how you might want to set up your bike!
Using the controls and the display, you can adjust just about everything your Lectric XP 2.0 can do. Pressing and holding the + and – buttons will take you to the settings screen and from there you can adjust how your bike operates.
The owner’s manual is a little confusing about what all of these settings really do. I will try to explain them in a less confusing way and give you some suggestions on how to set up your Lectric XP 2.0.
Some of the settings are used to adjust how the screen displays information and some settings will dramatically affect how your bike will ride.
You can find the Lectric XP 2.0 right here!
So let’s split them up into 2 categories –
- Parameter Functions – (non-ride affecting) such as brightness, km or miles, tire size, etc.
- Ride Functions – (ride affecting) such as top speed, throttle adjustments, motor sensitivity, etc.
I will quickly go over the Parameter Functions and then we’ll go deeper into the Ride Functions.
Quickly Ride to a Section -
How to Set Up Your Parameter Functions
In order to set up any of the functions you first need to power on your ebike by pressing and holding the power button.
Once your ebike is powered on, then you will press and hold the + and – buttons together for about 2 seconds until the screen changes and shows “01P” or “02P” and so on. It doesn’t matter which number it is on, you just want to see the small “P” behind the number.
To switch between the different numbers, tap the power button and you will scroll through all the different display settings from “01P” to “21P”.
(Keep in mind if you let it sit for about 5 seconds it will convert back to your normal and display the speedometer again. Just hold the + and – buttons again for 2 seconds to get back into the settings screen.)
To adjust the individual setting you will use the + or – button.
Here’s a Quick Rundown of the Parameter Settings –
01P
- Display Brightness – 1 (dimmer) to 3 (brighter)
02P
- Distance Units – 0 for Kilometers – 1 for Miles
04P
- Sleep Timer – Set to how many minutes you want the screen to stay on when you’re not riding
06P
- Tire Size – This is preset to 22, I find 24 to be more accurate
16P
- This will reset your odometer and I don’t recommend using it.
These settings are not critical and will not affect how your bike will ride, but it is nice to set them up correctly for yourself so you can easily tell what’s going on with your bike.
How to Set Up Your Ride Functions
These settings are the meat and potatoes of your new Lectric XP 2.0!
Here is a video I made, walking you through what each of these settings really does. You can play the video and follow along with the settings below!
–You can also scroll to the bottom for specific settings!–
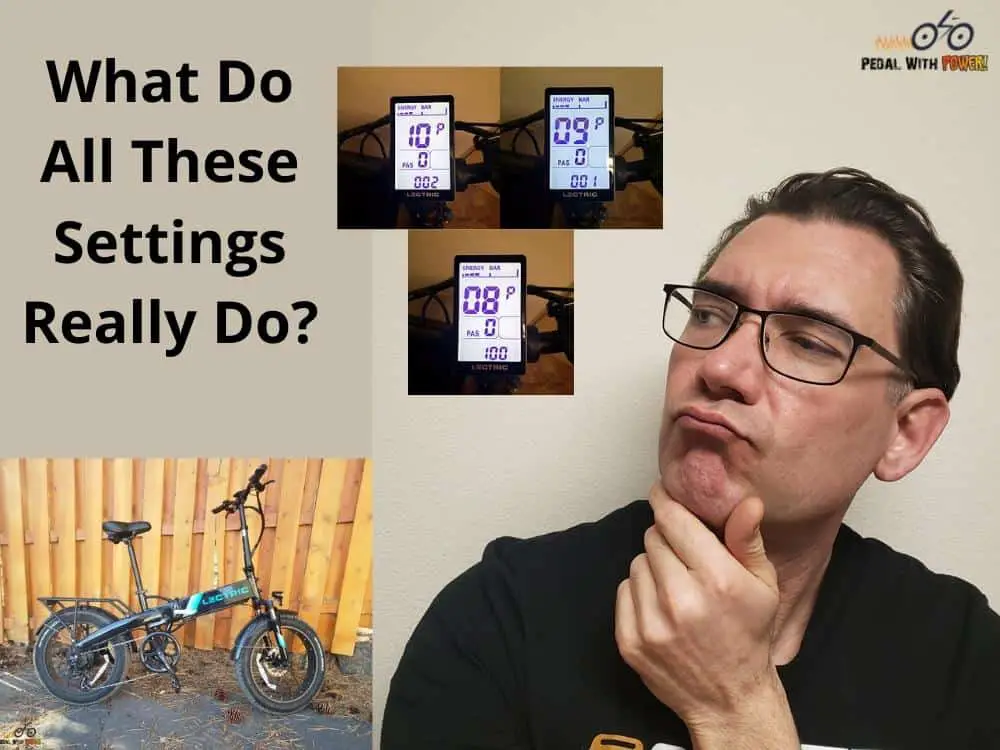
08P
This is the big one for lots of folks. This setting will set your pedal assist speed limit to either 20mph or 28mph.
In the manual, it says you can set the exact speed, but you can not. It also says that if you want your ebike to assist to 28mph then set this to 45, this is also wrong.
The bike comes with this setting preset to 32 (which means 32km or 19.9mph) but you can toggle this between 32 and 100. Now 100 will not let you go 100km per hour, that would be about 62mph!
Just think of these settings this way –
- 32 = 20mph max assist
- 100 = 28mph max assist
In order for this setting to actually come into effect you will need to adjust your “08P” setting to either 32 or 100, then press and hold the + and – buttons for 2 seconds until the screen goes back to the speedometer, THEN press and hold the power button to turn off your ebike.
Now you can turn your Lectric back on and it will assist to the speed you just set it to.
09P
- 0 = Throttle able to work while your bike is at a standstill
- 1 = Throttle will only work when your bike is moving
This setting is also very important! I would recommend leaving this setting at “1”.
The issue with setting this to “0” is that you could twist your throttle and have your bike jump forward when you don’t want it to. With the little 20” wheels it is easy for your ebike to shoot out from under you and possibly take you down too.
Even with this set at “1”, you could still accidentally grab your throttle while you are just pushing your bike because the bike just needs to be moving forward for the throttle to work, it does not have to be pedaled forward!
This is a downside to this bike’s design, it should have had a cadence sensor on the cranks so that you would have to start pedaling for the throttle to work.
I would highly recommend if you have to push your Lectric XP 2.0 for any distance to first turn off the system and just push it with everything off.
10P
This setting could come in very handy! This setting allows you to turn off the throttle completely!
- If you just want pedal assist and NO throttle, set this to “0”.
- If you want BOTH throttle and pedal assist, set this to “2”.
(If for some reason you only want throttle and no pedal assist then set this to “1”, but I don’t recommend it. You will get very little battery range and overstrain your motor!)
If you don’t use the throttle and are worried that you may accidentally grab it when you don’t want to, then you can simply turn it off and never worry again. 🙂
11P
This setting is telling your motor when you want it to start assisting based on how many pedal rotations you do.
This comes preset to “3”.
With this set at “1”, your motor will assist right away, with about a quarter-turn of the pedals.
This may seem great, but on bumpy roads, it will cause your motor to start assisting even when you are not pedaling!
You can set this all the way to “24”, but at this level, you will need to pedal about 3 times before the motor will kick in. This is pretty laggy in my opinion.
I would recommend leaving it at the prest “3” or maybe going a little higher to “5” or “7” if you plan to ride a lot of bumpy, off-road terrain.
If you want the most precision assist then set this to “1”, but I would only do this if you are mainly riding on smooth streets.
12P
This setting will tell your motor how strong you want it to start when using pedal assist.
This is preset to “1” which is the smoothest transfer of power and probably a good setting for most riders.
You can adjust this up to “5” if you want the motor to kick right in and give you the most boost right away. This can feel a bit jerky but will get you up to speed the quickest.
You can also set this anywhere between “1” and “5” to fine-tune your ride. If your ebike already feels like it’s jerking you forward then I would check this setting and make sure it is at “1”.
21P
This setting toggles the walk mode on and off.
- 0 = Walk mode off
- 1 = Walk mode on
If you don’t know what the walk mode is, then watch the video above and I will show you how to use it and why you may want to keep it turned on.
What is “Cruise Control” on the Lectric XP 2.0?
This is a kind of fun, but dangerous, setting on this ebike.
To enable cruise control, you need to have the throttle engaged and twist it a little. Then while keeping the throttle twisted, press and hold the “-” button. You will see the word “cruise” appear on your screen.
Then you can let go of the throttle and the bike will keep moving as if you were holding the throttle in that position.
This mode does not keep your bike at a certain speed! It will keep it moving at the level of throttle you twisted to.
So if you pull the throttle back the whole way and engage cruise control your bike will keep speeding up as if you were still holding the throttle back the whole way.
If you just twist the throttle back halfway, you will cruise as if you were still holding the throttle halfway.
To disengage the cruise control, just pull the brake levers.
I don’t really recommend cruise control, it’s kind of weird. Use at your own risk!
Specific Settings For the Lectric XP 2.0
For a Class 1 Ebike with Smooth Ride
Max pedal assist – 20mph: No Throttle: Gentle motor engagement
(This would be good for National Parks, State Parks, and most multi-use paths)
- 08P – 32
- 09P – 1
- 10P – 0
- 11P – 4
- 12P – 1
For a Class 2 Ebike with Smooth Ride
Max pedal assist – 20mph: With Throttle: Gentle motor engagement
(This is good for most streets and campgrounds)
- 08P – 32
- 09P – 1
- 10P – 2
- 11P – 3
- 12P – 1
For a Class 3 Ebike with Smooth Ride
Max pedal assist – 28mph: No Throttle: Gentle motor engagement
(This is only for more experienced riders and not allowed at most parks)
- 08P – 100
- 09P – 1
- 10P – 0
- 11P – 3
- 12P – 1
For Safer Off-Roading Set-Up
Max pedal assist 20mph: With Throttle: Mild motor engagement
- 08P – 32
- 09P – 1
- 10P – 2
- 11P – 7
- 12P – 2
For Pro Off-Roading Set-Up
Max pedal assist 28mph: With Throttle: Strong motor engagement
(experienced riders only)
- 08P – 100
- 09P – 1
- 10P – 2
- 11P – 4
- 12P – 5
Now, there are other ways to set up this bike so that it is the most responsive, but also the most dangerous and I will not cover those here.
If you want to play with the settings and crank everything up to the most sensitive then I’m sure you will figure it out. But, I don’t recommend setting this bike up that way.
At the End of the Day
So you can see that the Lectric XP 2.0 is pretty versatile in how you change it to fit your own riding style.
I set mine up the way I like and hopefully, now you can do the same.
I’m pretty impressed that this little ebike allows you to switch between Classes and tweak the sensitivity of the motor a bit.
I can see more ebikes adopting these features in the future.
Stay safe out there and Keep on Riding!
Pingback: tadalafil
Pingback: zithromax medication
Pingback: sildenafila
Pingback: diflucan generic
Pingback: mobic for nerve pain
Pingback: metoprolol tartrate 25 mg price
Pingback: doxycycline vibramycin 100 mg
Pingback: generic sildenafil cost
Pingback: is cenforce 150 safe
Pingback: hims vardenafil reddit
Pingback: semaglutid spritze handelsname
Pingback: propecia tablets price
Pingback: vardenafil 10mg price
Pingback: toradol pain treatment info
Pingback: ivermectin overview FAQ
Pingback: ivermectin demodex dermatology
Pingback: minoxidil men’s timeline